Do you want to install WordPress locally on Mac? Installing WordPress on your computer allows you to try out WordPress before you start a blog. In this article, we will show you how to install WordPress locally on Mac using MAMP.
Tip: Not using Mac? We also have a tutorial on how to install WordPress locally on Windows.
How to Install MAMP on Mac
The first thing you need to do is visit the MAMP website and download MAMP. Once the download is finished, you will need to open the downloaded file and drag the image file inside it to your Applications folder. Next, simply follow the on-screen instructions.
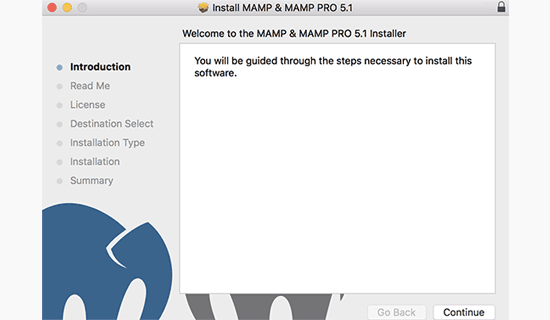
After the installation, you can go ahead and launch MAMP from the Applications » MAMP on your computer.
Note: MAMP also installs MAMP Pro (paid version), so remember to click on the right one.
Before you get started, we recommend configuring a few settings to make your MAMP experience better. You can do this by launching the Preferences menu and then switch to the ports tab.
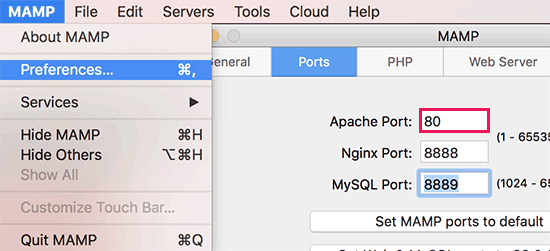
Enter port 80 for Apache and then click on the OK button.
Setting Apache to use port 80 will allow you to access your local websites from http://localhost instead of http://localhost:8888. However this also means that each time you start MAMP servers, you will have to provide the admin password of your computer.
The next step is to set the document root folder. This will be the folder where you will create and store your websites. By default, MAMP uses /Applications/MAMP/htdocs/ folder, but you can change that to a more accessible location.
In the preferences dialog box, click on Web Server tab and then select the folder where you want to store your websites. Ideally, you should store each of your website in a new folder inside the Documents folder.
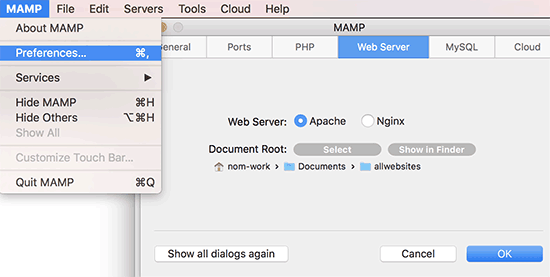
You can name this folder anything you want. For example, htdocs, mywebsites, wpdev, etc. For the sake of this article, we will call it allwebsites.
Click OK to save your changes.
Installing WordPress on Mac
Now that you have set up MAMP, let’s go ahead and install WordPress on your Mac computer.
First you need to visit the WordPress.org website to download a copy of WordPress. After downloading the file, you need to unzip it.
Next, copy the wordpress folder inside and paste it into your MAMP document root folder. You can rename this folder to anything you want (example: mysite, wpbeginner, etc).
WordPress needs a database to store all website data, so you will need to create a database before we install WordPress. Don’t worry, it’s not as hard as it sounds.
Simply click on the Open Web Start Page button in MAMP application window. A new browser window will open where you need to click on Tools » phpMyAdmin from the top menu bar.
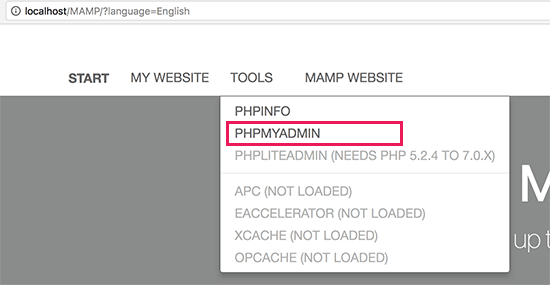
phpMyAdmin is a web-based application used to manage MySQL databases. In phpMyAdmin, you need to click on Databases and then create a new database.
You can name this database anything you want, but please write it down because you’ll need the database name in the next step. For this tutorial, we will call it test_db.

Now that you have created the database, it is time to install WordPress.
Go to http://localhost/mysite in a new browser tab. If you re-named the wordpress folder to something else, then use that name here.
You’ll now see the first step of WordPress installation wizard asking you to select a language.
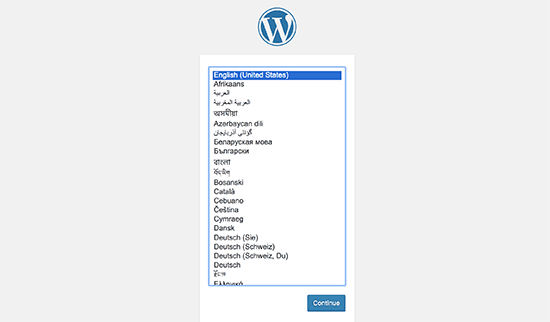
Select the language that you want to install WordPress and then click on the continue button.
On the next screen, WordPress will tell you about the information you will need to complete the installation. Click on the ‘Let’s go’ button to move forward.
Next, you will be asked to enter your WordPress database information. You already know the database name from the step earlier. For username and password, you need to use root. For the database host, you need to use localhost.
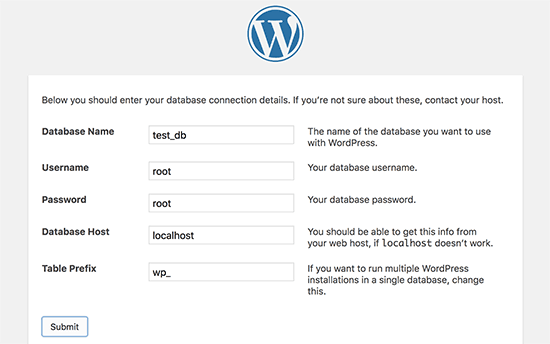
Once you are done, click on the submit button to continue.
WordPress will now connect to your database and create a configuration file for you. After this, it will show you a success message. Click on ‘Run the installation’ button to proceed.
On the next screen, WordPress will ask you to provide your website information, choose a username and password, and enter an email address. Go ahead and fill in the form and then click on Install WordPress button.
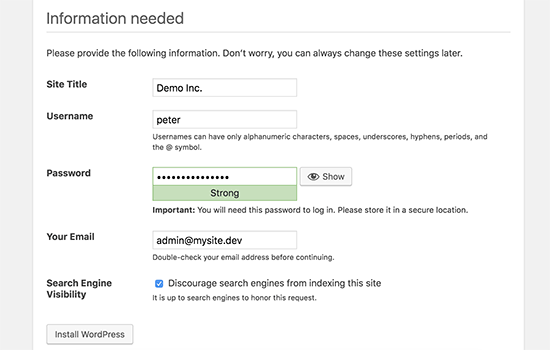
WordPress will now run the installation, and you’ll see a success message once it’s done.
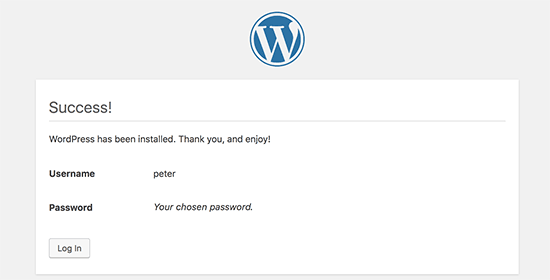
You can now go ahead and login to the WordPress site installed locally on your Mac computer.
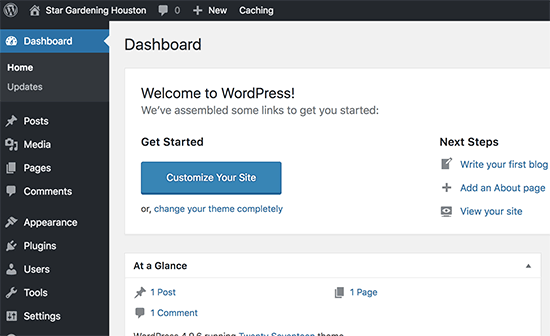
Trying WordPress Locally on Mac
The purpose of a local install is to help you test out WordPress or develop a website on your computer. Here are a few things you would want to try.
Moving Your Local WordPress Install to Live Website
Once you have played with WordPress locally, you’ll want to move it to a live website. This is the only way others will be able to see your website.
To do that you’ll need a domain name and web hosting account. A domain name is your website’s address on the internet, and web hosting is where your website files are stored.
We recommend using Bluehost. They are one of the biggest hosting companies in the world and an officially recommended WordPress hosting partner.
Luckily, they are offering WPBeginner users discount on hosting and a free domain name. Basically, you can get started for $2.75 per month.
→ Click Here to Claim This Exclusive Bluehost Offer ←
Once you have purchased hosting, see our article on how to make a website to install WordPress.
If you built a complete website already on your local host, then you can go ahead and follow our guide on how to move WordPress from local server to live site.
We hope this article helped you learn how to install WordPress locally on Mac using MAMP. You may also want to see types of websites you can create with WordPress.
If you liked this article, then please subscribe to our YouTube Channel for WordPress video tutorials. You can also find us on Twitter and Facebook.
The post How to Install WordPress Locally on Mac using MAMP appeared first on WPBeginner.
Source: Wordpres
The post How to Install WordPress Locally on Mac using MAMP appeared first on TuneMaster.ml.


