Samsung Galaxy Tab S4 review: This is not a laptop

I wanted to like this tablet. For months, I’ve been looking for something small enough for my camera bag that does just about everything I need on a daily basis. Up until now, I’ve been using the Pixelbook, and I liked it quite a bit, but the laptop just didn’t give me the extreme portability I’ve been craving.

Last week Samsung showed me the Galaxy Tab S4. I was apprehensive at first because I wasn’t a fan of the previous Tab S3, but Samsung assured me the new S4 added some new functionality that would change my mind on the whole system.

This is our Samsung Galaxy Tab S4 review.

Samung Galaxy Tab S4

Design

I have mixed feelings on the design of the Galaxy Tab S4.

The front of the tablet looks relatively sleek and modern, with significantly smaller bezels than the Tab S3. This results in the removal of the home button and fingerprint reader, which reduces functionality but looks better. The fingerprint reader has been replaced with face and iris scanning functionality, so you’ll still have a fast and secure way to unlock your device.

The oblong fingerprint reader from the last few Galaxy Tabs made the tablet feel cheap and outdated, and this new slimmer bezel design makes room for a bigger 10.5-inch Super AMOLED display that looks great. Samsung knows how to make good displays, and it didn’t skimp out with the Tab S4. Its screen has a 2,560 x 1,600 resolution, which is fine for nearly any situation.

The front may look sleek and modern, but the back unfortunately looks straight out of 2012. I don’t know why Samsung insists on keeping this old, boxy design. I personally hate it. Changing the shape of the camera may have made it feel more modern, but Samsung stuck to its guns with the form factor.

Samung Galaxy Tab S4

Moving to the sides, you’ll find a USB Type-C port, headphone jack, and quad stereo speakers. These speakers are tuned by AKG and support Dolby Atmos, resulting in some pretty big sound. I surprised by how loud it got when listening to music and watching movies. Its clear Samsung put a lot of effort into making content consumption a top priority on this thing.

On the right side, you’ll find power and volume keys, as well as a SIM tray for the LTE model. The other side is reserved for POGO pins for the keyboard case, which helps to connect the tablet to a full QWERTY keyboard. My biggest issue with this is how Samsung obviously sees the keyboard as a core part of the experience, but still sells it for a $150 premium. This keyboard case is especially important to the new software tricks the company is pulling this time around. It’s frustrating to only get part of the intended experience when you purchase the tablet itself.

Hardware

The Galaxy Tab S4 runs on a Snapdragon 835 SoC with 4GB of RAM, which holds up really well for daily use. I didn’t notice any severe hiccups or stutters on this device, though I can’t say how it will perform over time. Many people have reported their Samsung devices don’t hold up well after a year or so, but we’ll have to see how this device performs over time.

You’ll find cameras on the front and back of the device, with resolutions of 8MP on the front and 13MP on the back. I didn’t take a ton of photos with this thing for fear of being “that guy,” but the ones I took seemed extremely mediocre. I don’t want to keep comparing this thing to Microsoft’s new Surface Go, but that camera is stellar. I would like to see Samsung improve the quality of the front-facing shooter at least. Tablets are really only good for video calls, so that camera should at least be better than the rear shooter.

Galaxy Tab S4 camera test

The battery in this thing is 7,300mAh, which is a pretty big bump from the Tab S3’s 6,000mAh offering last year. The battery lasted about a day and a half of writing articles in coffee shops. This is definitely a big plus for this tablet, considering Samsung is marketing it for productivity-focused consumers.

As for storage, Samsung offers this device in 64 and 256GB variants. 64GB seems quite small, especially when Samsung wants you to replace your laptop with this thing, so I wish they would have at least started with a 128GB option. You can expand storage up to 400GB with a microSD card, but that means spending even more money to get this tablet to where Samsung should have shipped it in the first place.

Software

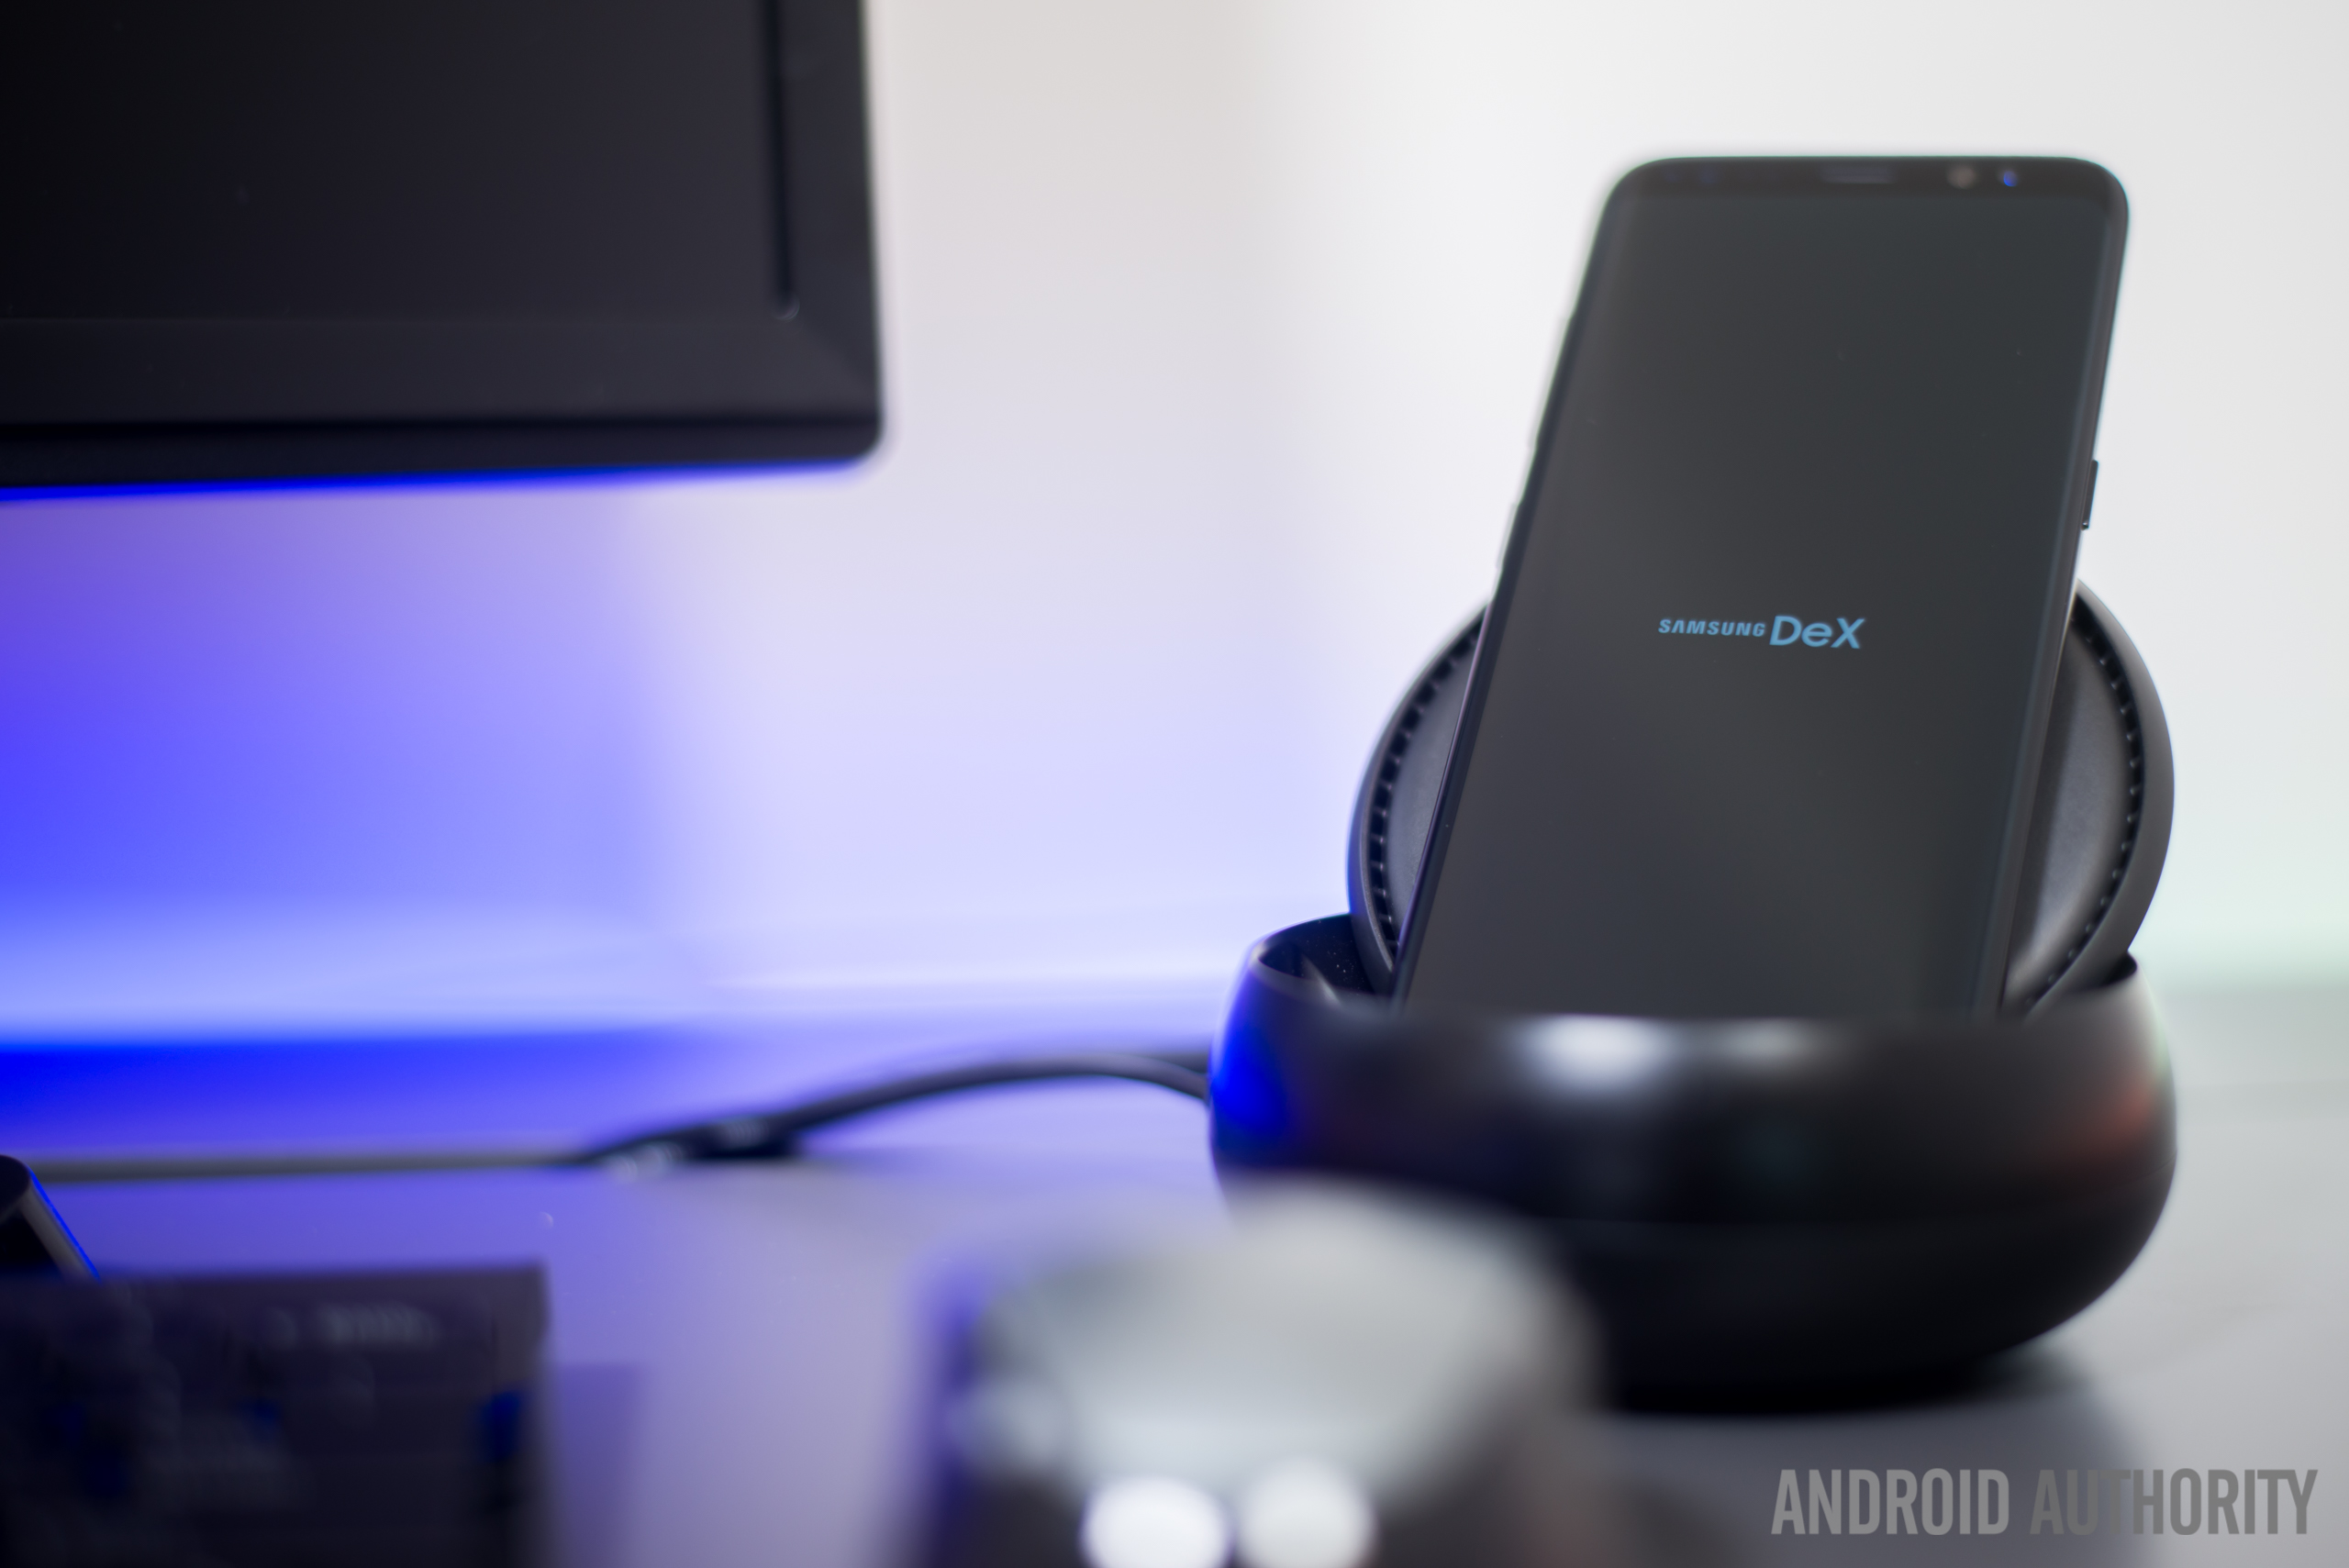
What really piqued my interest from this tablet was Samsung’s new Dex mode. Originally developed to harness the power of Samsung’s phone hardware for a desktop-like experience connected to an external monitor, Samsung has opted to implement the same technology into its new S4 tablet. The idea is great in theory, but there are many caveats Samsung will have to get around before I even begin to think about replacing my laptop with this.

To be fair, Dex mode looks great. It’s formatted similarly to a traditional Windows PC, so many will feel comfortable using it. That being said, it’s still an Android skin, with all the usual accompanying quirks.

See also:

Because it’s still Android, Dex has to run Android apps. This means you’ll have to use the mobile version of your browser to visit the mobile version of whatever website you want to open. The Tab S4 effectively stretches the site from a portrait orientation to a landscape one, which distorts pages. Many websites will prompt you to download their app from the Play Store for a better experience, but they’ll be stuck in a portrait orientation, which really doesn’t take advantage of the Tab S4’s screen. If you’re using Chrome, we recommend you toggle the “Desktop site” option, though you’ll have to do it with every new tab.

Dex still feels half-baked on this device

A few apps felt useful to have from the Play Store. Facebook Messenger works great with its floating bubbles, and using Spotify in the background is effectively the same as using the Desktop app on a traditional laptop setup. Still, the whole experience just feels awkward, and until apps are able to effectively resize based on screen orientation it’s hard to see myself getting a whole lot of work done.

In non-Dex mode, this tablet works just like any other Android device. It’s definitely the optimal mode to be in if you’re just surfing the web or consuming content, and web browsing is more pleasing on Samsung’s own browser in this format. Apps will expand correctly too. I’d keep your tablet in this format while consuming content like Netflix and YouTube.

Otherwise, this is the same old Android you’re probably used to. It runs Android 8.1 Oreo with the Samsung Experience version 9.5 skin, and feels extremely similar to Samsung’s smartphones.

Accessories

For $150, Samsung will sell you a folio-style keyboard case for the Tab S4. This is inexcusable to me, because Samsung obviously designed the Tab S4 with the keyboard in mind. By only buying the tablet, you are robbing yourself of the primary software attraction of this device. Without the keyboard, this is just another boring Android tablet.

The keyboard itself is just alright. The buttons have ok tactile feedback, but they’re not as good as something like the Microsoft Surface keyboard. It’s also quite cramped, spanning horizontal space nearly equivalent to the tablet. I often found my fingers tripping over one another. The materials in this keyboard definitely don’t feel like they’re worth $150, but you’ll have to get it if you want this thing to be the “productivity machine” Samsung advertises.

Probably the worst part about the keyboard overall is it’s lack of a trackpad. Samsung highly encourages you to get a Bluetooth mouse to navigate the experience, despite advertising the ability to work on a train with this thing. Navigating the Dex interface without a trackpad is extremely difficult, especially considering it’s made to work more like Windows. Good luck trying to click on small elements or copy and paste text with your fingers. It sucks.

The Tab S4 also comes with a special S Pen, which looks much more like a traditional pen than something from the Samsung Galaxy Note line. Unfortunately, it feels extremely cheap, like it could break at any moment if you put too much pressure on it. This is unfortunate considering it now supports 4,096 levels of pressure sensitivity, but at least it’s included with the purchase. Unfortunately, you have nowhere to attach the pen to unless you spring for that $150 keyboard case, meaning you’ll probably lose it.

The accessories are way too expensive, and should have been included.

Samsung is also selling a USB Type-C to HDMI adapter to connect your tablet to an external monitor, but that will cost you an additional $50. The external monitor will display Dex while the tablet returns to its standard mode, meaning you can’t extend the display, which is disappointing. You’ll need a wholly separate Bluetooth mouse and keyboard for this to work effectively too.

Specs

  Samsung Galaxy Tab S4
Display 10.5-inch Super AMOLED
2,560 x 1,600 resolution
287ppi
Processor Snapdragon 835 quad-core
RAM 4GB
Storage 64 or 256GB
MicroSD Yes, up to 400GB
Camera Rear: 13MP AF with f/1.9 aperture
Front: 8MP with f/1.9 aperture
Battery 7,300mAh
Non-removable
Connectivity Wi-Fi 802.11 a/b/g/n/ac
Wi-Fi Direct
Bluetooth 5.0
USB 3.1
USB Type-C
Software Android 8.0 Oreo
Dimensions and weight 249.3 x 164.3 x 7.1mm
Wi-Fi: 429g
LTE: 434g

Gallery

Should you buy it?

The Samsung Galaxy Tab S4 won’t replace your laptop. While the new Dex mode offers a great experience, in theory, it feels extremely half-baked — you’ll be consistently frustrated while using it.

Since the keyboard is separate, but nearly necessary, this tablet will run you almost $800, which is far, far too expensive for a tablet with a mobile SoC, 64GB of storage, and 4GB of RAM. You could buy a fairly decent Windows machine for that cost. The small bits of convenience you are afforded by Android is completely outweighed by the mediocre experience.

Unless you really, really want an Android tablet, you should not buy the Galaxy Tab S4. Go buy a laptop instead. Or an iPad. Just don’t buy this.

Source: Android Zone

The post Samsung Galaxy Tab S4 review: This is not a laptop appeared first on TuneMaster.ml.

Google Pixel 3 XL images leak again, and this time it’s the real deal (Update: unboxing video)

Update, August 08, 10:51AM ET: More images have been posted alongside an unboxing video that very briefly shows off the Pixel 3 XL in all of its glory as well as the packaging and accessories bundled with the phone. From the unboxing video (mirrored above from a Russian tech blogger’s Telegram account) and the additional images we can see that the Google Pixel 3 XL box contains the previously noted Pixel Buds-style USB-C earphones, a 3.5mm adaptor, a USB adapter, and a USB-C cable.

In addition, we can now see that the power button is a different color from the rest of the phone after all, only it’s a light shade of green/blue rather than orange like we’d previously seen on prototype models.

Google Pixel 3 XL display leak
Google Pixel 3 XL retail box leak
Google Pixel 3 XL leak rear power button

Original coverage, August 08, 09:58AM ET:We’re still a couple of months away from the expected launch of the Google Pixel 3 and Pixel 3 XL in October, but the leaks just aren’t stopping. Just over a week after we got our latest hands-on look at prototypes of Google’s third-generation flagships, but we’re now seeing images emerge of what appears to be an actual production model.

Shared by a Russian tech blogger (via Android Police), the images (below) once again show off the Clearly White variant of the larger of the two upcoming Google phones, only this time we can see the Big G’s logo on the rear, part of the retail packaging, an on-screen list of key specs, and, for the first time for a Pixel release, a bundled set of earphones.

Editor’s Pick

Starting with the phone itself, the images once again show a device with a sizeable chin and a thick display notch.

In several shots you can see that the notification bar is little fatter that we’ve come to expect to fit the notch’s length and that the icons are fewer in number due to the reduced space.

It’s also possible to make out the dual-tone white finish on the rear. Based on previous speculation, it’s believed that the phone will have a glass rear with a plastic material covering the bottom half.

Google Pixel 3 XL rear
Google Pixel 3 XL specs leak
Google Pixel 3 XL USB-C earphones
Google Pixel 3 XL lock screen

One small detail that appears to have changed between prototype to production is the orange power button, instead, the button appears to be finished in the same shade of white as the rest of the phone. The contrasting-color button was reserved for the popular Black and White colorway for the Pixel 2 XL — a.k.a. the Panda phone — so there’s still a chance it might make a comeback elsewhere.

The biggest surprise, however, is the inclusion of bundled earphones. Judging by the images, these are USB-C buds (no, the headphone jack isn’t coming back) that closely resemble Google’s premium wireless Pixel Buds. Here’s hoping they deliver on audio quality and aren’t just a cheap pair of disposable earphones that get immediately resigned to the bin.

Finally, we can make out a couple of Settings screens that detail the Pixel 3 XL’s chipset, display resolution, and, to no one’s surprise, confirm that the phone will run the latest version of Android, the newly monikered and released Android 9.0 Pie.

The images show that the phone will be powered by an octa-core Qualcomm processor (4 x 1.77GHz and 4 x 2.8GHz), which is almost certainly the Snapdragon 845 SoC, backed by 4GB of RAM and an Adreno 630 GPU. The display is also listed as having a 1,440 x 2,960 resolution with a 494 ppi rating.

What do you make of the newly leaked images? Is this the Pixel 3 XL you wanted to see? Let us know in the comments.

Up next: Android 9.0 Pie update tracker: What we know so far

Source: Android Zone

The post Google Pixel 3 XL images leak again, and this time it’s the real deal (Update: unboxing video) appeared first on TuneMaster.ml.

How to Fix Common SSL Issues in WordPress (Beginner’s Guide)

Moving a WordPress site to SSL can sometime result in unexpected issues. If you’re adding SSL to an existing WordPress site and are running into errors, then you’re in luck. In this guide, we will cover how to fix the most common issues with SSL / HTTPs in WordPress.

Fixing common HTTPS / SSL issues in WordPress

What is SSL / HTTPS and Why You Should Start Using it Right Away?

SSL / HTTPS is an encryption method that secures the connection between users’ browser and your WordPress hosting server. This makes it harder for hackers to eavesdrop on the connection.

Each SSL / HTTPS enabled site is issued a unique SSL certificate for identification purposes. If a server is pretending to be on HTTPS, and its certificate doesn’t match, then most modern browsers will warn the user from connecting to the website.

Insecure connection warning

Last year, Google announced plans to improve overall web security by encouraging website owners to start using SSL / HTTPS.

As part of this plan, Google’s Chrome web browser now marks all websites without an SSL certificate as “Not Secure”.

Chrome HTTP not secure

The ‘Not Secure’ label in the browser’s address bar gives a bad impression to your customers about your business.

Aside from that, you also need SSL / HTTPS enabled if you want to make an online store or want to use payment services like PayPal, Stripe, Authorize.net, etc.

Considering the pros and cons, all websites need to switch to SSL / HTTPS. If you haven’t already done that, then head over to our guide on how to properly move WordPress from HTTP to HTTPs for step by step instructions.

That being said, let’s take a look at some of the common issues with SSL/HTTPS in WordPress and how to fix them.

1. Fix NET::ERR_CERT_INVALID Error

This error message appears in Google Chrome. Other browsers display this error with a slightly different message, but it basically warn users that their connection to your website is insecure.

Certificate authority invalid error

This error message indicates that users’ browser didn’t accept the certificate presented by the website. This could happen due to a number of reasons:

  • The SSL certificate is issued to a different domain name or subdomain.
  • The certificate has expired.
  • Your browser doesn’t recognize certificate issuing authority.

If you purchased an SSL certificate and asked your WordPress hosting provider to install it for you, then you can contact them to fix it for you.

If you manually installed SSL certificate, then try reinstalling it or contact your SSL certificate provider for support.

2. Fix Mixed Content Errors After Moving WordPress to SSL / HTTPS

Mixed content errors are caused by sources (images, scripts, or stylesheets) that are still loading using the insecure HTTP protocol in the URLs.

If that is the case, then you will not be able to see a secure padlock icon in your website’s address bar.

Not secure

There are two ways to fix SSL / HTTPS mixed content errors in WordPress. We will show you both of them and then you can pick one that works best for you.

1. Fixed mixed content errors in WordPress using a Plugin

This method is easier and is recommended for beginners.

Simply install and activate the Really Simple SSL plugin. For more details, see our step by step guide on how to install a WordPress plugin.

Upon activation, you need to visit Settings » SSL page to review plugin settings. Really Simple SSL works out of the box and will automatically take care of SSL / HTTPS settings and fix mixed content errors.

Really Simple SSL settings

Note: The plugin attempts to fix mixed content errors by using output buffering technique. This can have a negative performance impact on your site. However, if you are using a caching plugin, then it will only impact the first page load.

2. Manually Fixed Mixed Content Errors in WordPress

This method requires manual troubleshooting, but it is more effective and better for performance.

First, you need to make sure that you are using HTTPS in WordPress settings. Go to Settings » General page and make sure that WordPress Address and Site Address options have HTTPS URLs.

WordPress URL settings

If you see URLs starting with HTTP, then you need to go ahead and change them to HTTPS. Don’t forget to click on the save changes button to store your settings.

Next, you need to find old HTTP URLs in your WordPress database and replace them with the new HTTPS URLs.

You can easily do that by installing and activating the Better Search Replace plugin. For more details, see our step by step guide on how to install a WordPress plugin.

Upon activation, you need to visit Tools » Better Search Replace page. In the ‘Search’ field, you need to add your website URL with HTTP. After that, add your website URL with https in the ‘Replace’ field.

Search and replace URLs in database

The plugin will now update URLs in your WordPress database.

If you are still seeing mixed content errors, then the next step is to troubleshoot URLs in your WordPress theme and plugins.

Using your browser’s Inspect tool, you will need to locate the resources causing the errors and where they are loading from.

Using inspect tool to locate mixed content errors

For theme resources, you will need to find them in your WordPress theme and replace HTTP with HTTPS.

This part can be a bit difficult for beginners as they will have to look for the URLs in all theme files.

If you are unable to find them yourself, then you can also reach out to theme developer and request them to update their theme. They will need to use WordPress best practices to load files, which will fix the HTTP/HTTPS issue.

Same goes for the mixed content loaded by a WordPress plugin. We don’t recommend editing plugin files yourself to change the URLs. You should notify the plugin developer and request them for an update. Meanwhile, you can disable the plugin on your site or find an alternative plugin.

3. Fix Too Many Redirects Errors After Moving to SSL / HTTPS

WordPress allows you to enforce SSL / HTTPS for the admin area by entering the following line into your wp-config.php file.

define('FORCE_SSL_ADMIN', true);

However, in some scenarios this setting alone would cause ‘Too many redirects‘ error. To fix this, you will need to add the following code to your wp-config.php file just before the line that says ‘That’s all, stop editing! Happy blogging.’.

define('FORCE_SSL_ADMIN', true);
// in some setups HTTP_X_FORWARDED_PROTO might contain 
// a comma-separated list e.g. http,https
// so check for https existence
if (strpos($_SERVER['HTTP_X_FORWARDED_PROTO'], 'https') !== false)
       $_SERVER['HTTPS']='on';

4. Fix WordPress HTTP to HTTPS Redirect

WordPress will not automatically redirect HTTP requests to HTTPS unless you tell it to do so. If you are using a plugin like Really Simple SSL, then it would take care of redirects. Otherwise, you will have to manually set up redirects.

To set up HTTP to HTTPS redirect, you need to add the following code to your .htaccess file.

<IfModule mod_rewrite.c>
RewriteEngine On
RewriteCond %{HTTPS} off
RewriteRule ^(.*)$ https://%{HTTP_HOST}%{REQUEST_URI} [L,R=301]
</IfModule>

We hope this article helped you fix some common issues with SSL / HTTPS in WordPress. If you run into an issue that’s not covered in this article, then please leave a comment to let us know. We will update the article with the solution. You may also want to see our ultimate WordPress security guide with step by step instructions for beginners to secure their WordPress websites.

If you liked this article, then please subscribe to our YouTube Channel for WordPress video tutorials. You can also find us on Twitter and Facebook.

The post How to Fix Common SSL Issues in WordPress (Beginner’s Guide) appeared first on WPBeginner.

Source: Wordpres

The post How to Fix Common SSL Issues in WordPress (Beginner’s Guide) appeared first on TuneMaster.ml.